Sitemap.xml - what it is and how to create a sitemap in XML format
Sitemap contains information about the content of a website. It is a file mostly prepared in XML format, which is placed directly on the server. Thanks to the Google sitemap, a bot visiting our site has access to the content of the site and its structure. From this text you will learn what a sitemap is, learn about the different types of sitemaps and learn how to create them.
To start, we’ll go through the types of sitemaps so you’ll gain an idea of which one might be most appropriate for your site and what it should contain. There are some elements to edit and add, but if you learn the general principles and follow what I’ve written here, you should have no problem.
Later in the text, I will answer perhaps the most important questions: how to generate such a map, and how to submit it to Google using the Google Search Console tool.
You don’t have to be a se expert, all this is quite simple to do even for a “non-technical” person, on one condition - you need to know what and how. So let’s start exploring the secrets of sitemap!
Why is a sitemap important?
.
The biggest benefit of having a sitemap.xml file for your site is to make things easier for Google’s robots. Googlebot will traverse your site faster, so you will see an increase in the number of indexed pages in the search engine. This will work especially well for large sites, as the indexing robots will definitely know that a particular URL is on the site. This is important in the case of addresses to new entries or subpages.
Thanks to the sitemap.xml file, indexing bots will be able to reach the nooks and crannies of sites that do not practice good internal linking rules quite efficiently and quickly.
It is also worth taking into account that when comparing to sites without sitemap you will gain an advantage due to faster Googlebot reaching the nooks and crannies of your site…
In addition to the sub-page links themselves, you can give Googlebot information about:
- date of last change at the indicated url, .- the title of the entry, .- graphics, .- language in which the entry was created (hreflangs), .- priority of the sub-page in the domain .
What is the sitemap.xml file
.
Sitemap is basically a text file containing a list of URLs. If this file is not hidden, it can often be found by adding in the URL of domain the suffix /sitemap.xml (example: https://seomatch.senuto.com/sitemap.xml).
XML(Extensible Markup Language) is the language in which sitemap is made. It is nothing more than a markup language that is used to represent data in a structured way, making it easy to read for both humans and machines.
A sitemap file should:
- contain no more than 50,000 URLs, .- be smaller than 50 MB, .- have UTF-8 encoding .
Of course, if your site is larger and does not meet the above requirements, nothing prevents you from preparing several separate sitemaps, e.g. for products, for blog posts, for static pages, etc. Of course, sitemaps are unlikely to be made manually. You can use various tools, generators or plugins to make them (I will write more about them later). However, it’s good to know what a correct sitemap should look like, just so that after the program makes it, you can check if it’s definitely a good one.
Types of sitemaps
.
First of all, we have several types of sitemaps. Choosing the right one depends solely on what is on your site.
If you have an online store, you can prepare a separate sitemap for products, which in the case of a blog will not be completely necessary. However, dividing into different sitemaps is not mandatory. It will help you organize and systematize your data. For large sites, it is useful because you may not be able to fit within the guidelines (50,000 URLs), so splitting into products, blog and categories is most advisable.
Sitemap index - summary map
.
Sitemap_index.xml is a file where we collect all sitemaps created within one site.
It should contain such tags as:
- information given at the beginning and end of the file that this file will be a sitemap index, .- - information given at the beginning and end of the file about the addition of the sitemap, .- - the URL of the sitemap .
Example sitemap index code:
..
In this example, I have included two site maps that I prepared earlier. Of course, the name is arbitrary and does not have to look like the example. As I mentioned earlier, some sites specifically rename sitemaps. The important thing is that you know which file is responsible for which part of the site.
Custom sitemap
.
The idea here is to prepare a file that is very similar to a sitemap index, but instead of a sitemap it will contain URLs from your site.
Therefore, it will contain different tags:
along with the namespace specification inside the tag, .- starting tag for a single page, .- URL of a single page, .
Optional tags can be placed inside the
transmits data about the last modification of the content in a given URL .- provides information about the frequency of changes to the page .- the priority of the URL on the page determined on a scale of 0.0 - 1.0
Example of sitemap:
..
In this example, I made a sitemap where I reported the URL, the last modification date and the priority for each subpage. Note that if you add the
Page map under Google News
.
If you publish content in Google News then know that you need to prepare a separate sitemap specifically for this content.
It’s important to keep your site’s URLs up to date. Google suggests that the sitemap prepared for Google News should include URLs published within the last 2 days. These articles are supposed to be in this map for 2 days. After that time, you can remove them from the sitemap. Importantly - they will remain in the index for the next 30 days, but if you care about these articles you can move them to the regular sitemap.
Such juggling of articles within the sitemap under Google News is important because, unlike other sitemaps, there can be only 1,000 articles in it.
You can also apply another solution. Split the sitemap into smaller sitemaps and place them in the sitemap index. However, don’t make a new sitemap for each update - Google doesn’t like that. The sitemap index should contain up to 50,000 sitemaps, so using it at most you can provide information on 50,000,000 articles.
The tags under Google News are different from the earlier ones, so:
- information about the type of entry .- - type of publication .- - the name of the news publication. Must match the name displayed in the article on news.google.com - the language of the publication .- <publication_date> - publication date in W3C format .- - title of news article .
Content to appear in Google News should be marked by appropriate structured data. You can find guidelines for including this type of data in news entries here.
A sample sitemap under Google News:
..<urlset xmlns=“http://www.sitemaps.org/schemas/sitemap/0.9”.xmlns:news=“http://www.google.com/schemas/sitemap-news/0.9”>.
In this sample sitemap, I have included only one news entry. If I wanted to add another one, immediately after closing the url tag, i.e. , you need to open another one with the same
Video site maps
.
Creating such a map gives you the opportunity to show additional information about the videos that are on your site. The size guidelines for this type of sitemap are the same as for the other types, excluding sitemaps under Google News.
Google recommends that such sitemaps only include pages related to the site’s profile i.e. for an electronics store, for example, equipment reviews, or for a videographer, a portfolio page. Therefore, we can forgive ourselves for placing, at least, short inserts or videos promoting our business partners.
Remember also not to block Google’s robot through the robots.txt file. By doing so, you would effectively make it harder for Googlebot to reach your video. The same goes for submitting videos that require a login. Unfortunately - this will not pass. Videos must be publicly accessible.
Mandatory tags that must be included in such a map:
- starting tag .- - the url where the video is located .- video:video - starting tag, where we put data about the video .- video:thumbnail\_loc - link to the thumbnail of the video .- video:title - title of the video .- video:description - description of the video, maximum 2048 characters .- video:content\_loc - url of the video - video:player\_loc - url to video player
Recommended tags:
- video:duration - specifies the length of the video in seconds from 1 to 28800 - 8 hours, no need to count ????
- video:expiration\_date - the date after which the video will no longer be available, in a format that follows W3C guidelines, of course. You can omit it if you want this video to be available on your site all the time.
Example:
.<urlset xmlns=“http://www.sitemaps.org/schemas/sitemap/0.9”.xmlns:video=“http://www.google.com/schemas/sitemap-video/1.1”>.
Sitemap for graphics and photos
..
The sitemap size guidelines for graphics and photos are the same as the others, without Google News, of course.
When creating this type of site map, use the xml namespace: xmlns_image=“http://www.google.com/schemas/sitemap-image/1.1″
As with any type of sitemap, this one also has its own unique tags:
- image:image - information about a single image .- image:loc - link to the graphic .
Optional tags:
- image:caption - image caption .- image:geo\_location - geographical location of the image .- image:title - image title .- image:license - URL to image license
Example:
..<urlset xmlns=“http://www.sitemaps.org/schemas/sitemap/0.9”.xmlns:image=“http://www.google.com/schemas/sitemap-image/1.1”>.
In this example, I have demonstrated how to create a sitemap for one subpage with two photos. If there would be more of these images, I start with a new tag before the image:image tag. In case you would like to add a new page to the map, you start over with a new tag
How to make a good sitemap?
.
Now that you know what types of sitemaps you have available and the scheme for creating them, I’d like to give you some tips. By applying them you will be sure that Google will understand your intentions correctly.
The most work is with absolute links. It is quite monotonous work, however, you need to focus on it as much as possible. The links you place in the sitemap must be exactly the same as those on your site. If your site is https://www.twojastrona.pl then the link saved in the sitemap cannot have this form: https://twojastrona.pl.
Provide only canonical URLs in the sitemap. If you use your site in two versions, e.g. with www and without www, then choose whichever version you like, but I rather suggest the one you like better and publish the sitemap in it. In the other version of the site, set redirects to the sitemap version.
All URLs that are in the sitemap must be placed in a way that the server they are on can read them. However, if you don’t do the sitemap manually, you are unlikely to have to worry about this.
The last tip concerns the characters used in sitemaps. As I wrote at the beginning, the sitemap must be made in UTF-8 format. As a result, you cannot use Polish characters in it. If the name of your domain contains a Polish character, remember that it is converted to the corresponding string. For example, the domain wisła.pl will be such a string: xn—wisa-21a.pl
What URLs to exclude from sitemap?
.
A sitemap has map in its name for a reason. Let’s remind the basic task of the map. The person who uses it is supposed to get to the place of his choice as quickly as possible. Sometimes, however, it is the case that the map is out of date and instead of a quick route, the person encounters roadworks and a detour over potholes and other potholes. Eventually the person will reach his destination, but after a little wrangling and the stress of having to look for another route, because he doesn’t know where this detour will take him.
Now, instead of the word “person”, the basics of Googlebot. See? The website structure must be presented simply and consistently. Therefore, remember not to include pages in the sitemap that:
- do not exist - those with a 404 error .- lead to URLs with 301,302 redirects - this way you will only duplicate Google robot visits to the target page .- are blocked by robots.txt file .- require a login .- are password-protected .- pages for regulations, RODO, etc .
Sitemap generators
.
Manually working on a sitemap for large sites is practically impossible. Fortunately, you can use programs, sites or plugins to help you make the perfect sitemap.
In the case of WordPress, you can use RankMath or YoastSEO plugins. These are two combos that help optimize SEO of your site and, among other things, will perform the sitemap for you. In addition to these two, the XML Sitemaps plugin, which is just for generating sitemaps, is very popular.
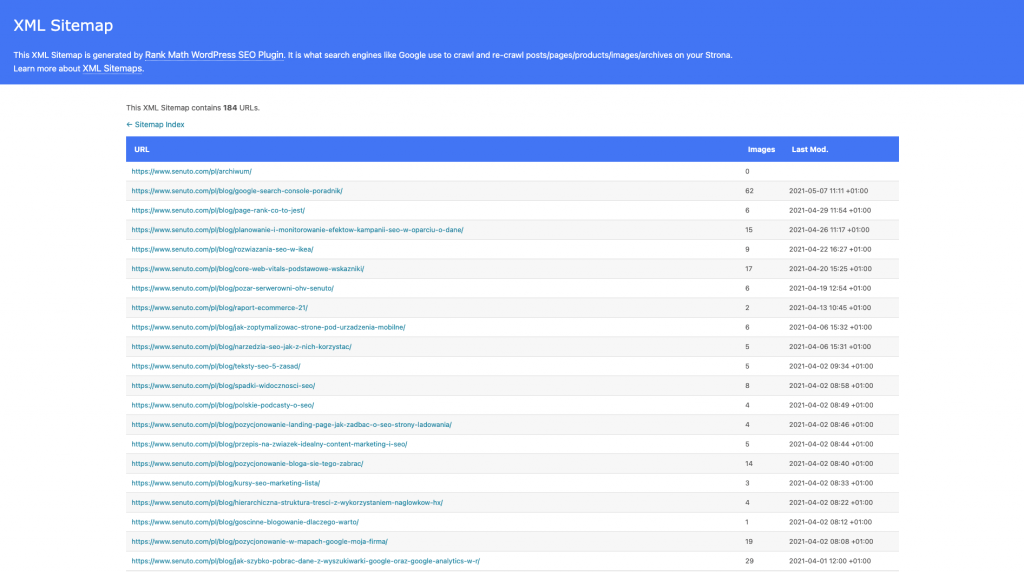
This is what a sitemap generated by RankMath looks like
However, if your site is not CMS-based you can use cloud-based solutions:
- xml-sitemaps.com/ - will generate a sitemap of up to 500 subpages for you for free .- g-sitemap-generator.com/ - Polish online tool that will prepare 1,000 links for you for free .- XML sitemap Generator - will generate a sitemap of up to 2,000 links for free
There is also a third option. Using a crawler that will scan your website. Personally, I use Screaming Frog and with it you can, of course, generate a sitemap. In the free version up to 500 URL’s.
Here you will find instructions on how to generate a sitemap using Srcreaming Frog.
Remember that the sitemap generator is a helpful tool for making a sitemap, however, it is always a good idea to manually check it before submitting the sitemap to Google or placing it on the server.
Where to put the sitemap.xml file?
.
The sitemap can be published anywhere on the site. However, keep in mind that it affects elements that are only in that directory. The most common solution is to place the site map in the root directory of the site.
Site map submission to Google
.
We are slowly approaching the end of our journey. You already know what a sitemap is, what types of sitemaps there are, you know good practices and you know where on the server to place your files.
Now it’s time for the final step, which is submitting your sitemap.xml file to Google.
The easiest way to do this is through Google Search Console. If you don’t know what GSC is, I invite you to read the complete guide on Google Search Console.
In it is described from A to Z everything about this tool from Google.
I, in this section, will focus on the Index section and the Site Map tab. This is the magical place where you can report all your site maps. By looking there from time to time, you will see when Google last looked at your sitemap - this information is located in the Last Read column. Next to your sitemaps you can also see a graph icon. When you click on it, you will be redirected to the Status tab, where you can check in detail whether the given sitemap is sending erroneous URLs.

Google Search Console - Sitemaps tab
.
There is another way to show Googlebot if and where we have a sitemap. This solution is the robots.txt file. All we need to do is use a directive in this file:
Sitemap: anydomain.com/sitemap.xml
And there you have it. Of course, if there are more of these sitemaps, there is nothing stopping you from including them in this file.
What else is worth remembering when creating sitemap.xml
.
It’s certainly worth remembering to take a look at it from time to time and do a periodic review to see if you’re sure everything is in order with it. This is where Google Search Console will certainly help.
And let’s not forget about the changes that sometimes happen to the site, such as the installation of an SSL certificate, which will completely change our links. If we don’t use a plugin, you’ll have to do all the work manually as soon as possible.
Remember the pages you have removed or those with redirects. Sometimes you remove something, sometimes you edit or change something, and the sitemap what it was, is what it is.
As you can see, a sitemap is a bit of fun and a lot of guidelines, but done well it will help Googlebot get to know your site better. And don’t forget about updates. Be better than Google and update your Site Maps faster!

Jakub Trybuła
Specjalizuje się technicznymi aspektami pozycjonowania. W swojej pracy wykorzystuje narzędzia takie jak Senuto, Screaming Frog, Chrome DevTools czy WebPageTest, by nie tylko przyciągnąć ruch na stronę klienta, ale przede wszystkim zwiększyć sprzedaż.
All articles →